
Making french bread sourdough at home is a rewarding way to combine the crisp crust and airy texture associated with French-style bread with the deep flavor created by natural fermentation. Unlike bread made primarily with commercial yeast, sourdough relies on a living starter containing wild yeast and beneficial bacteria. With the right flour, hydration, fermentation time, shaping technique, and baking temperature, you can create a loaf with a golden crust and soft, chewy interior.
Whether you are a beginner learning how sourdough works or an experienced baker looking to improve your French-style loaves, understanding the process makes a significant difference.
What Makes French-Style Sourdough Different?
French-style sourdough is generally characterized by a thin, crisp crust, a light and chewy crumb, and a subtle fermented flavor. The dough can be shaped into a baguette, bâtard, boule, or another traditional form.
The ingredients are usually simple:
- Flour
- Water
- Sourdough starter
- Salt
The simplicity means technique becomes especially important. Fermentation controls flavor and structure, while shaping and baking determine the final appearance and texture.
The Role of Natural Fermentation
A healthy sourdough starter provides the microorganisms needed to ferment the dough. As fermentation progresses, the dough develops acidity, flavor, and gas that helps it expand.
Fermentation can take several hours, depending on starter strength, flour, water temperature, and room temperature. Rather than following the clock alone, bakers should learn to recognize visual and textural signs of properly fermented dough.
Choosing the Right Flour
Flour is one of the most important decisions when making French-style sourdough.
Traditional French bread is often associated with French flour types such as T55 or T65, but strong bread flour or high-quality all-purpose flour can also produce excellent results.
| Flour Type | Typical Characteristics | Best Use |
|---|---|---|
| T55 | Light and relatively refined | Baguettes and lighter loaves |
| T65 | Slightly more flavorful and mineral-rich | Artisan French-style bread |
| Bread flour | Higher protein and strong gluten | Higher-volume sourdough |
| All-purpose flour | Moderate protein and versatile | Beginner-friendly loaves |
| Whole wheat | Nutty flavor and more fiber | Blended doughs |
If you are new to sourdough, a reliable bread flour or all-purpose flour is often easier to handle. Once you understand fermentation and dough development, experimenting with French flour becomes more interesting.
Understanding Hydration
Hydration refers to the amount of water compared with the amount of flour in a bread formula.
Higher hydration generally produces a wetter, more extensible dough and can contribute to a more open crumb. However, very wet dough can be challenging to shape.
For a French-style loaf, moderate-to-high hydration can provide a useful balance between openness and manageability.
Why Hydration Matters
Too little water can create a dense, stiff loaf. Too much water can make the dough difficult to handle and may cause it to spread if gluten development and fermentation are not well controlled.
Beginners should start with a manageable hydration level rather than immediately attempting an extremely wet dough.
Building and Maintaining a Strong Starter
A successful loaf begins with an active starter.
A starter is typically maintained by feeding it flour and water at regular intervals. When it becomes active, it should show bubbles, expansion, and a pleasant fermented aroma.
Signs Your Starter Is Ready
Look for:
- Noticeable expansion after feeding
- Bubbles throughout the mixture
- A slightly domed or active surface
- A pleasant tangy or fermented smell
- A texture that appears aerated rather than dense
Using a weak or inactive starter can result in slow fermentation and poor oven spring.
If your starter consistently struggles to rise, focus on improving its feeding routine and temperature before attempting an ambitious bread recipe.
A Simple Dough Formula
A practical starting formula for two medium loaves might include:
| Ingredient | Approximate Amount |
|---|---|
| Bread or French-style flour | 500 g |
| Water | 350–375 g |
| Active starter | 100 g |
| Salt | 10–11 g |
These proportions can be adjusted according to the flour, climate, starter hydration, and desired texture.
In warm or humid conditions, you may find that slightly less water makes the dough easier to manage.
Step-by-Step Preparation
1. Mix the Flour and Water
Begin by combining the flour with most of the water. Mix until there are no dry patches.
Allowing the mixture to rest before adding salt and starter can help the flour fully absorb the water and begin developing gluten.
2. Add the Starter and Salt
After the initial rest, incorporate the active starter and salt.
Work the ingredients into the dough until everything is evenly distributed. The dough may initially feel sticky, but avoid automatically adding large amounts of flour.
3. Develop the Gluten
Instead of relying entirely on intensive kneading, sourdough dough can be strengthened through a series of folds.
During the first few hours of fermentation, perform gentle stretch-and-folds at regular intervals.
With each fold, the dough should become smoother, stronger, and more elastic.
4. Complete the Bulk Fermentation
Cover the dough and allow it to ferment at room temperature.
The exact time varies considerably. Temperature, starter strength, flour, and hydration all affect fermentation speed.
Rather than waiting for the dough to exactly double, look for:
- Increased volume
- Visible bubbles
- A smoother surface
- A lighter, airier texture
- Dough that holds some structure when moved
Over-fermented dough may become weak and sticky, while under-fermented dough can produce a dense loaf.
Shaping the Dough
Once bulk fermentation is complete, gently turn the dough onto a lightly floured work surface.
Avoid aggressively pressing out all the accumulated gas.
Shaping a Baguette
For a baguette-style loaf, gently stretch the dough into a rectangular shape and fold it to create surface tension. Roll it carefully while keeping the structure intact.
The finished loaf should have enough tension to maintain its shape without being compressed.
Shaping a Bâtard
For a bâtard, gently flatten the dough, fold the sides inward, and roll it into an elongated oval.
A well-shaped loaf should feel cohesive and elastic.
Proofing After Shaping
Place the shaped dough into a floured couche, banneton, or appropriately prepared container.
You can proof at room temperature or use a refrigerated fermentation for additional flavor and convenience.
A cold proof can make the dough easier to score and handle while allowing fermentation to continue gradually.
However, fermentation should always be judged by the dough rather than by a rigid timetable.
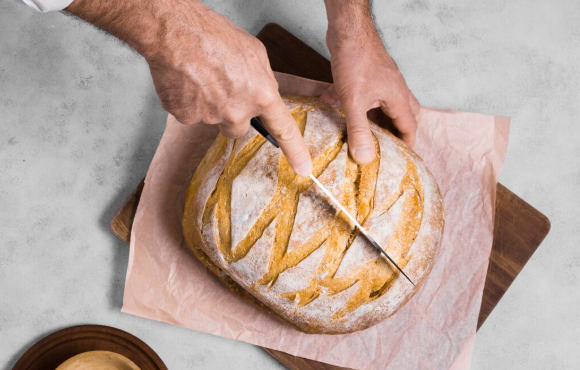
Scoring the Loaf
Scoring gives expanding gases a controlled path to escape during baking.
Use a very sharp bread lame or razor blade to make deliberate cuts across the dough.
For baguettes, several angled scores are traditional. For round or oval loaves, a single long slash or decorative pattern can work well.
Score confidently and avoid repeatedly dragging the blade through the dough.
Creating a Crisp Crust
Steam is particularly useful during the early part of baking.
A humid baking environment helps delay crust formation so the dough can expand before the exterior becomes firm.
Home bakers can create steam by using a covered Dutch oven or another safe steam-producing method.
Once the initial expansion period has passed, the bread can finish baking in a drier environment so the crust becomes crisp and deeply golden.
Baking Temperature and Timing
A thoroughly preheated oven is essential.
Many artisan-style sourdough loaves benefit from a very hot initial baking temperature, followed by a reduction as the loaf continues baking.
The exact temperature and baking time depend on loaf size, oven performance, dough hydration, and baking equipment.
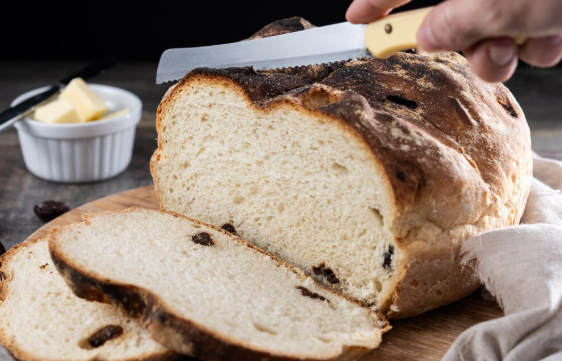
A properly baked loaf should have:
- A deeply golden or brown crust
- A firm exterior
- A hollow-sounding crust when tapped
- A fully set interior
- Good volume and visible oven spring
Do not slice immediately after removing the bread from the oven. Allowing the loaf to cool gives the crumb time to finish setting.
Common Problems and How to Fix Them
Dense Interior
A dense crumb may result from weak starter activity, insufficient fermentation, inadequate gluten development, or overly gentle shaping.
Start by checking whether your starter is consistently active before changing the entire recipe.
Flat Loaf
A loaf that spreads rather than rising upward may have been over-fermented or insufficiently shaped.
Too much water can also make shaping difficult.
Pale Crust
A pale crust can result from insufficient baking time or inadequate oven temperature.
Make sure the oven is fully preheated and allow enough time for the crust to develop a rich color.
Very Sour Flavor
A stronger sour flavor can develop with longer fermentation, particularly under cooler conditions.
If you prefer a milder loaf, experiment with fermentation length and starter proportions.
Tough Crust
An excessively thick crust may result from overbaking or inadequate moisture during the early baking stage.
Adjust the baking environment while still ensuring that the interior is fully cooked.
Tips for Better Results Every Time
Consistency is one of the biggest advantages you can develop as a sourdough baker.
Use a digital scale instead of relying entirely on volume measurements. Small differences in flour and water can noticeably affect dough consistency.
Also keep notes about:
- Flour brand and type
- Amount of starter
- Water temperature
- Room temperature
- Fermentation time
- Number of folds
- Proofing time
- Baking temperature
- Final results
These notes help you understand how your dough behaves in different conditions.
Adjust for Your Environment
Sourdough is highly sensitive to temperature.
In a warm kitchen, fermentation may happen quickly. In a cool kitchen, the same dough may require significantly more time.
Do not force the dough to follow a recipe’s exact timetable if its appearance tells you something different.
How to Serve French-Style Sourdough
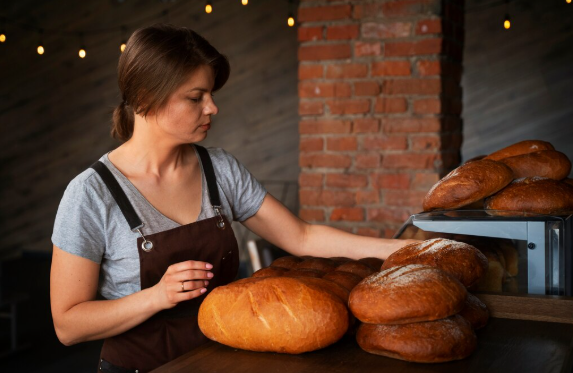
Freshly baked bread can be enjoyed in many ways.
Try serving it with:
- Salted butter
- Olive oil and herbs
- Cheese
- Soup
- Roasted vegetables
- Eggs
- Sandwich fillings
- Garlic and herb spreads
- Jam or honey
The crisp crust and chewy interior also make this style of bread excellent for toast and open-faced sandwiches.
How to Store Homemade Bread
Fresh sourdough is best stored at room temperature in a breathable bread bag, paper bag, or bread box.
Avoid sealing a warm loaf in an airtight plastic container because trapped moisture can soften the crust.
If you need longer storage, slicing and freezing the bread is practical. Individual slices can be removed as needed and reheated directly from frozen.
Key Points to Remember
- Use a healthy, active sourdough starter.
- Choose flour that provides enough structure for the loaf you want.
- Measure ingredients by weight for greater consistency.
- Avoid adding excessive flour to sticky dough.
- Develop gluten through kneading or folding.
- Judge fermentation by the dough rather than time alone.
- Shape gently while creating enough surface tension.
- Score with a sharp blade.
- Use steam during the early stage of baking.
- Let the finished loaf cool before slicing.
- Record your process so you can improve future batches.
Final Thoughts
French-style sourdough combines simple ingredients with careful fermentation and baking techniques. The most important skills are learning how your starter behaves, recognizing proper fermentation, developing gluten without overworking the dough, and creating the right baking environment.
You do not need professional equipment to get started. A kitchen scale, mixing bowl, sharp scoring blade, and well-preheated oven can take you a long way. As you gain experience, you can experiment with different flours, hydration levels, fermentation schedules, and loaf shapes.
The goal is not simply to follow a fixed timetable. It is to learn how the dough looks, feels, smells, and responds throughout the process. With practice, you can consistently produce crusty, flavorful homemade bread with a satisfying artisan texture.
Frequently Asked Questions
1. Can beginners make French-style sourdough at home?
Yes. Beginners can successfully make it at home by starting with a manageable hydration level, an active starter, and a straightforward fermentation schedule. Learning to recognize dough readiness is more important than having advanced equipment.
2. What flour is best for French-style sourdough?
Bread flour, high-quality all-purpose flour, and French-style flours such as T55 or T65 can all work well. The best choice depends on the texture and flavor you want and how easy you want the dough to be to handle.
3. Why is my sourdough loaf dense instead of airy?
A dense loaf can be caused by an inactive starter, under-fermentation, insufficient gluten development, or incorrect shaping. Check starter activity and fermentation first before making major changes to the recipe.
4. Can I let the shaped dough rise in the refrigerator overnight?
Yes. Refrigerated proofing is commonly used for sourdough because it slows fermentation and can make the dough easier to handle and score. The exact refrigeration time should be adjusted according to dough activity and temperature.
5. How do I keep the crust crispy after baking?
Allow the bread to cool completely before storing it. Use a breathable bread bag or bread box rather than an airtight plastic container. For longer storage, freezing the loaf or individual slices helps preserve its quality.